If you would like to follow along (in code) with the steps in this article, you can download the example code from GitHub.
Likewise, if you straight away want to see the code actually working, you can also run this example in codesandbox.io.
Upfront Disclaimer: I am the author of thespa-toolsopen-source components used to build the example for this article.
Old School Way
You may or may not remember how older search engines used to present results in a paginated manner, where you’d have to click number/next/previous links to load desired pages. Nowadays, that old pagination pattern has been “thankfully” replaced with automatic loading of results so that as you scroll down, more results magically appear. This is such a natural, seamless experience, it’s hard to believe and take for granted that we didn’t always have that experience.
Likewise, web application data—especially when displayed in a table—suffers from the same old pagination pattern. It amazes me that so many applications are still presenting data this way when such a pattern adds little-to-no value to the user, and in fact can be frustrating, especially when you throw filtering and sorting into the mix.
Out with the Old, In with the New
The good news is that implementing infinite scroll behavior for your app’s paginated data is super doable. In this article, I’ll show you step-by-step how easy it can be to implement infinite scrolling in a web app that consumes paginated API data. Let’s get after it!
Step 1 – Basic Layout
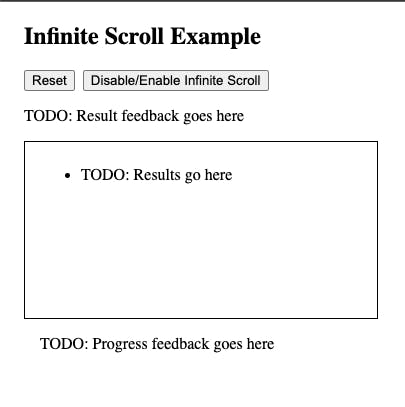
The basic layout of our view. Here we just want to get the UI in a good starting state with nothing really to display in terms of data.
import classes from './styles.module.css';

export function InfiniteScrollExample() {
  return (
    <div className={classes.rootContainer}>
      <h2>Infinite Scroll Example</h2>
      <div className={classes.toolbar}>
        <button>Reset</button>
        <button>Disable/Enable Infinite Scroll</button>
      </div>
      <div className={classes.resultFeedback}>
        TODO: Result feedback goes here
      </div>
      <div className={classes.scrollContainer}>
        <ul>
          <li>TODO: Results go here</li>
        </ul>
      </div>
      <div className={classes.progressFeedback}>
        TODO: Progress feedback goes here
      </div>
    </div>
  );
}
We now have a nice starting point to create some infinite scroll goodness!

Step 2 – Wiring Up API Data
In this step, we utilize a React hook from the @spa-tools/api-client package that not only makes interfacing with API data a breeze, but it also has an awesome feature to append data results automatically for us, which is exactly what we want to do here.
First, let's define a simple interface for the recipe model we want to use.
interface Recipe {
  difficulty: string;
  id: number;
  name: string;
}
Next, let's setup the useCallEndpoint hook from the @spa-tools/api-client package, which is as simple as passing in an API URL and specifying some options.
const [
  getRecipes,
  recipesResult,
  isRecipesCallPending,
  clearRecipes
] = useCallEndpoint<Recipe[]>(
  'https://dummyjson.com/recipes',
  {
    // we only want to retrieve 10 recipes at a time
    requestOptions: { recordLimit: 10 },
    // the data result that we want is nested
    // under response JSON's 'recipes' key
    serverModelOptions: { jsonDataDotPath: 'recipes' },
  },
  // setting to true here tells the api client that we want to append
  // new results to previous results, making the data cumulative
  true
);
Sweet! Now let's add a useEffect hook that will fetch an initial batch of recipes for us.
useEffect(() => {
  if (!isRecipesCallPending && !recipesResult) {
    getRecipes();
  }
}, [getRecipes, isRecipesCallPending, recipesResult]);
Cool beans! We're now fetching data, so let's render some UI for it.
<div className={classes.scrollContainer}>
  <ul>
    {recipesResult?.data?.map((recipe) => (
      <li key={recipe.id}>
        {`${recipe.name} (${recipe.difficulty})`}
      </li>
    ))}
  </ul>
</div>
We can now refactor our loading feedback to "react" to the API call.
{isRecipesCallPending &&
  <div className={classes.progressFeedback}>Loading recipes...</div>
}
Likewise, let's add a couple of variables to track loading metrics.
const count = recipesResult?.data?.length ?? -1;
const total = recipesResult?.total ?? 0;
And let's get those metrics rendering as well.
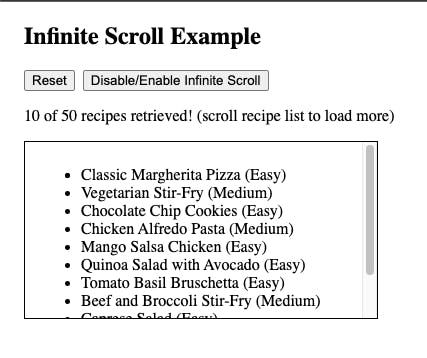
<div className={classes.resultFeedback}>
  {count && total ? `${count === total ? `All ${count}` : `${count} of ${total}`} recipes retrieved!` : ''}
  {count && total && count < total ? ' (scroll recipe list to load more)' : ''}
</div>
Super! Our little app now loads an initial batch of recipes with user feedback working. Let’s keep going and get the infinite scroll pattern implemented.

Step 3 – Adding a scroll target
The scroll target is simply a sentinel div element that sits right below the list of recipes that the user will scroll. Its role is to help determine when the user has scrolled enough to warrant retrieving more data.
Here we add a useRef hook that will hold a reference to our scroll target div element.
const scrollTargetRef = React.useRef<HTMLDivElement>(null);
And now we add the new scroll target div just below where our list of recipes render.
<div className={classes.scrollContainer}>
  <ul>
    {recipesResult?.data?.map((recipe) => (
      <li key={recipe.id}>{`${recipe.name} (${recipe.difficulty})`}</li>
    ))}
  </ul>
  <div className={classes.scrollTarget} ref={scrollTargetRef} />
</div>
Step 4 – Wiring Up Infinite Scroll Behavior
Again, we utilize another nice hook from the @spa-tools/interaction-hooks package that will do all the heavy lifting for us in terms of infinite scroll detection.
As you can see, all we have to do is pass in the ref of our scroll target.
const isScrolling = useInfiniteScroll(scrollTargetRef);
And now the isScrolling boolean will let us know when we need to fetch another batch of recipes. To do that, let's refactor our useEffect hook, accordingly.
useEffect(() => {
  if (
    (isScrolling && !isRecipesCallPending && count < total) ||
    (!isRecipesCallPending && !recipesResult)
  ) {
    getRecipes();
  }
}, [count, getRecipes, isRecipesCallPending, isScrolling, recipesResult, total]);
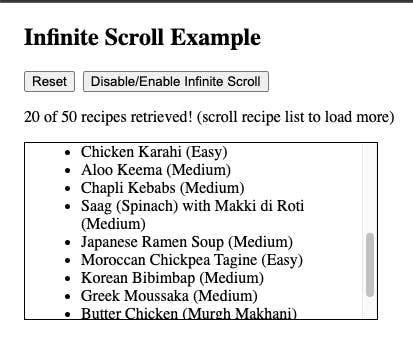
We now have fully functioning infinite scroll functionality...see how easy that was!

Step 5 – Adding in ability to disable infinite scrolling
There may be situations where need to disable infinite scrolling. Doing so is as easy as passing an active boolean into the useInfiniteScroll hook call.
Let’s add a useState hook to track disable/enable toggle state and then pass the current value into the useInfiniteScroll hook.
const [disableScroll, setDisableScroll] = React.useState(false);

const isScrolling = useInfiniteScroll(scrollTargetRef, disableScroll);
And now add a callback to help us manage that state.
const toggleDisableScroll = () => {
  setDisableScroll((prev) => !prev);
};
Let's refactor the button we originally scaffolded for this feature.
<div className={classes.toolbar}>
  <button onClick={clearRecipes}>Reset</button>
  <button onClick={toggleDisableScroll}>
    {disableScroll ? 'ENABLE' : 'DISABLE'} Infinite Scroll
  </button>
</div>
Now if you toggle to disable the infinite scroll, the user scrolling will no longer trigger data to be retrieved.
Step 6 – Tweaking the target scroll padding
By default, the “retrieve next set of data” scroll state triggers when the user scrolls all the way to the bottom of the overflow container, which is when our scroll target passes into the scroll plane. However, if you’d rather trigger sooner than that to act as a buffer to mitigate users seeing a blank scroll area, it's trivial to make it happen.
All you need to do is change the style on the scroll target div to position: relative; and then set its top property to a negative value, depending on how much buffer you’d like. For example, top: -32px; would cause the next data fetch to trigger when the user has approximately 32px remaining at the bottom of the scroll container, versus the default of 0px.
.scrollTarget {
  position: relative;
  top: -32px;
}
Every UI scenario is different, so the buffer padding amount will really depend on the behavior you desire.
Wrap-up
I hope this article has helped so you can leave old pagination patterns in the dust while creating cool user experiences via infinite scroll. Get your hands dirty by checking out the example code on GitHub so you can see firsthand how easy it is or interact with the live Devbox below.
Cheers,
Ryan

